
As a lifelong Mac user, would my fear of falling behind be greater than my fear of change?
If you're an artist working in digital design, you've more than likely used an Apple computer. Heck, you might be reading this article on an iPhone while your Mac Pro renders out your latest project, all while your MacBook Pro's fan ramps up to 15,000RPM so Civ VI doesn't melt the motherboard. Being entrenched in Apple products can be fine, but what if you wanted to switch over to PC for work? How hard is the transition going to be?
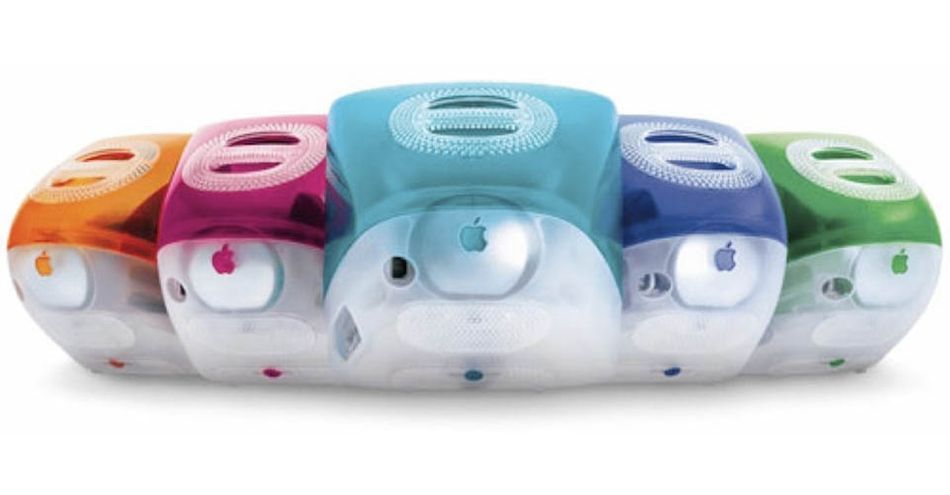
I remember when I first started learning what we ultimately know now as the field of motion graphics. It was around 2000 and I was in college. In our art department building—that was actually a converted house—we had a computer lab filled with a colorful array of blueberry iMac G3’s They were loaded up with Adobe Photoshop, Illustrator, and the very first 3D application I’d ever use: Strata 3D PRO! Yeah, that’s right. Pro!

Back then, I don’t think I even questioned why Macs were the computer of choice for artists and designers. Pixar was a household name at this point, and Steve Jobs was one of their founders. Common knowledge said Macs were the computers artists used. The OS was aesthetically pleasing and incredibly intuitive. It was MADE for artists. You didn’t need to have an IT degree, it was powerful, it never crashed, it got out of your way and just worked!
Macs have been with me my entire career. At my internship doing graphics for a local NBC station in Pittsburgh, the art department was powered by those beautiful cheese grater Power Mac G5s. I learned After Effects on those beasts! Fast forward to 2009 and the beginning of my freelance career where I was learning Cinema 4D from fellow Mac Pro users like Greyscale Gorilla. I worked on my trusty 17” MacBook Pro until I got my freelance career rolling, where I saved enough to upgrade to a souped-up ‘cheese grater’ Mac Pro in 2011! Life was good.
Then in 2013, Apple introduced their (affectionately called) “trash can” Mac Pros. Of course I bought one! I’ve been an Apple user my entire professional life, why would I stop now? At every milestone in my career, a Mac was the tool of choice. When I thought about doing motion design, it was always on a Mac. It’s all I’ve ever known! That psychological connection was strong.
About 3 years into using my “trash can”’ Mac Pro, I started to worry. There was no news of any new Mac Pro on the horizon, and the nonexistent upgradability of the trash can boxed (or cylindered) me in. I also learned about more and more 3D artists starting to use Redshift and Octane renderers that had incredible render speeds! I needed to get in on that action! Alas, I found out that all these renderers were limited to Nvidia graphics cards, and my Mac Pro had dual AMD FirePro cards (one of which was never used due to application limitations). Sad trombone. What to do? Go PC? NEVERRRRR!

I soon heard from a friend about an external GPU solution where you could buy a box and throw an Nvidia GPU in it, plug it into your Mac, and run these third party render engines! Insert “Take My Money” GIF! I soon hooked this up, and used an awesome site called epu.io to guide me through the somewhat janky setup process. And okay, sure. When I fired up my Mac, I had to do a weird Apollo 13-level precision timing of when I would flip the switch on the eGPU box during start up so it would be recognized. But other than that, it WORKED! I was soon using Redshift and Octane on my Mac!
FIVE. YEARS. LATER.

Mac OS stopped supporting Nvidia drivers years ago, so I’m stuck using High Sierra if I want to use my eGPU. Apple came out with a very overpriced Mac Pro in 2019 that uses AMD cards. My options: hold on for dear life to my very old trash can Mac Pro, take out a mortgage for the new Mac Pro that won’t allow me to use the software I need to be able to keep up to date in the industry...or...gasp...go PC.
Spoiler alert, after much hand wringing...I ended up getting a PC with help from the amazing folks at Puget Systems, and you can read all about my setup here. It was definitely nerve wracking to go from Mac to PC. I’m sure you might be thinking of making the jump from Mac to PC and might be a little apprehensive. But I’m here to tell you that it’s okay. My PC isn’t perfect and I miss Mac OS every day, but the air from my dual 3090s buzzing through a render is drying my tears. At the end of the day, the fear of falling behind became bigger than the fear of change.
The Great Migration

Mac has an easy-to-use Migration Assistant feature that I’ve used every single time I got a new Mac. It allowed me to transfer files from the old Mac to the new one, but obviously I couldn’t do this to migrate to PC. One thing that made the switch amazingly seamless was the fact that I use Dropbox for most of my files and personal data. I have all my assets, project files, and way too many photos of my pug all in the cloud. This meant that after installing Chrome, I could download Dropbox and have all of my most important files synced (over LAN!) pretty quickly. All that’s left is to download all my most used apps such as Adobe Creative Cloud, Cinema 4D, and Minesweeper, and I’m ready to go.
I highly recommend shelling out for either Dropbox or Google Drive so you can not only easily sync your files, but you’ll always have a backup, and can easily send links to clients. I’ve been using Dropbox for years and years and it's been rock solid for me. Microsoft has their own version of Dropbox called OneDrive that allows you to share files between Macs and PCs as well.
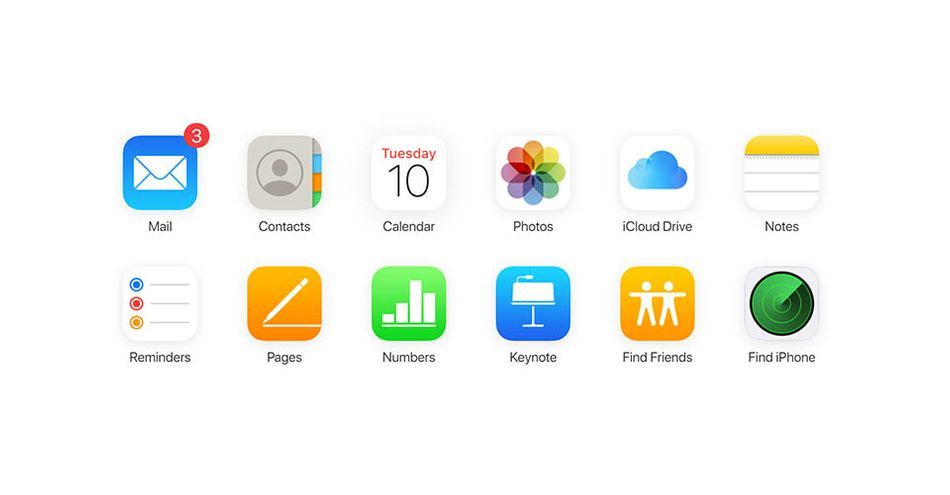
Let’s talk about iCloud, which is Mac’s cloud service that allows you to store and access your photos, documents, e-mails and other data from your iPhone and iCloud account. On Windows, you can use the iCloud for Windows app that allows you to access your iCloud account easily on your PC. You can click a single button to open up your iCloud drive in File Manager, allowing you to sign in and easily access your iCloud account on iCloud.com. On the iCloud website, you can access your Apple Mail, Notes app (which I brain dump on frequently), iCloud Drive, and other files easily in your browser.
Now what if you don’t have anything in the cloud and you have everything on external hard drives? That’s when things can get tricky. Mac drives are formatted differently from PC ones, but luckily there are some easy solutions to this problem. MacDrive allows you to mount any Mac disk on your PC allowing you to open and edit your Mac files or even transfer your data from the Mac to PC by accessing your Mac files through Windows Explorer.
Do Your Best Mac Impression
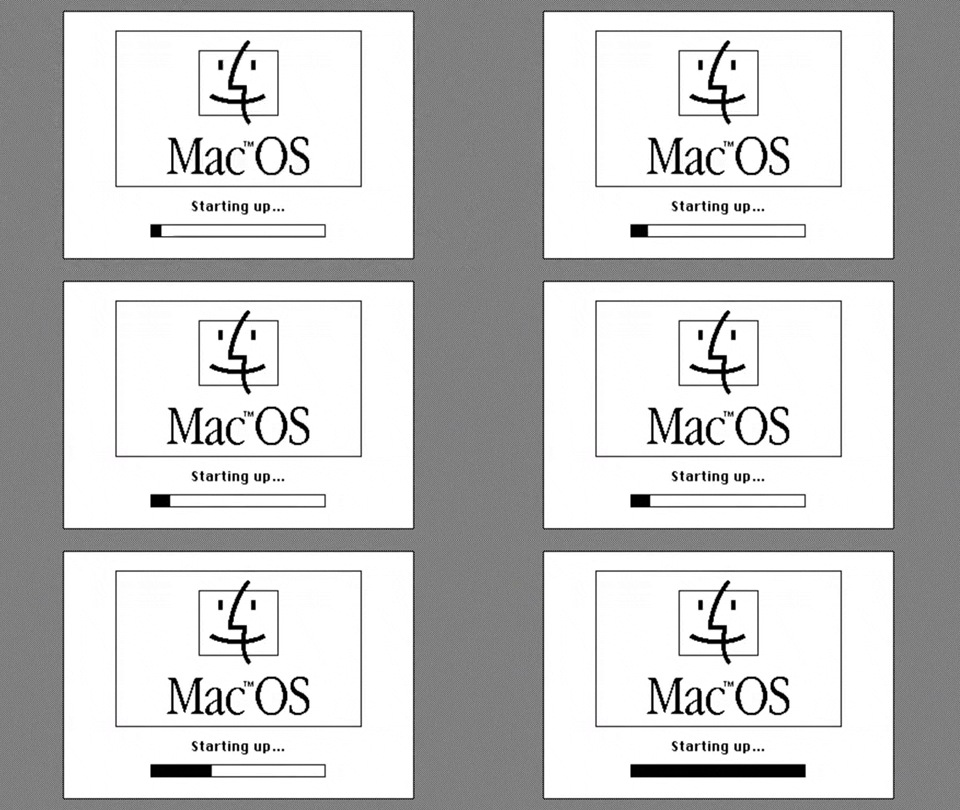
A good part of my first couple weeks of working on a PC was trying to see how I could bring that MacOS experience to the PC. Let’s face it: Windows 10 is a tire fire in some areas. The File Explorer is awful, and some applications like Disk Management looks like it hasn’t been updated since Windows 95.
Two apps I immediately downloaded from the Microsoft Store were Files—which is a much more aesthetically pleasing file management app that I use in place of File Explorer, and that has tabs—and QuickLook—which tries it best to imitate the quick look feature on MacOS where you can preview a file by selecting it and pressing the Spacebar. Both of these apps are free ninety-nine. You can also check out Xyplorer as a Files alternative and Groupy for not only tabbed file manager windows but tabbed applications.
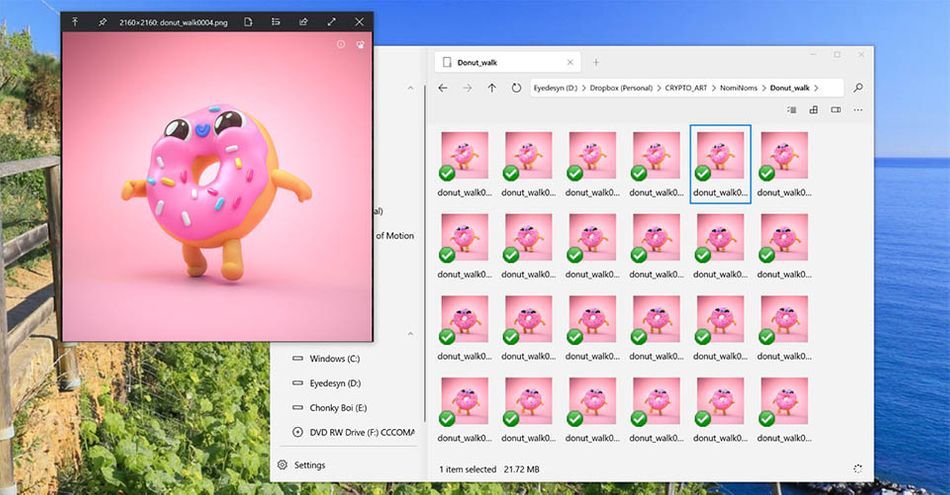
Another MacOS feature I used a ton was Spaces, or Mission Control, where you could have multiple virtual desktops that are great for compartmentalizing tasks. Using Mission Control, you could assign different windows or applications to a certain desktop and swap between them with a shortcut key. With my dual monitor setup, I’d assign my Mail app with Chrome and Twitter on one monitor, and Slack and Discord on the other monitor. This was my not-doing-so-much-workspace. Then I had my actual workspace that had Cinema 4D and After Effects assigned to its own monitor. I could switch back and forth between workspaces with a shortcut key.
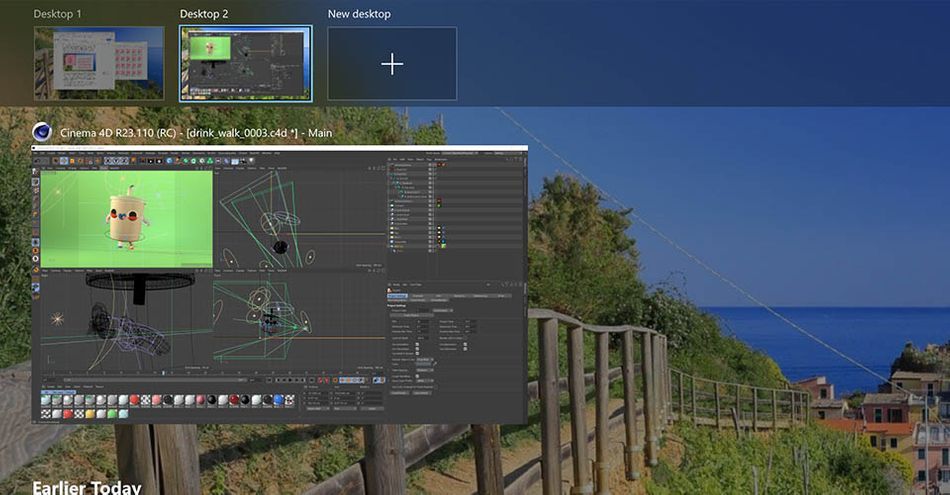
Luckily, Windows 10 has an okay version of this functionality called Virtual Desktops. You can see the virtual desktops via holding [Windows]+[Tab], and add a virtual desktop via clicking on "Add Desktop" from there. Then, you can switch from a virtual desktop to another with the [Windows]+[Control]+[Right or Left Arrow].
Another feature I used a ton was the screenshot shortcut keys in MacOS to quickly take a screen grab of my entire monitor or a portion of it. Windows has its own version of this called Snip & Sketch which you can activate by pressing [Windows]+[Shift]+[S]...and it functions pretty nicely. There’s another app a lot of people swear by for even more functionality called ShareX that not only allows you to create screenshots, but allows you to annotate on your screen capture (which is great for tutorials), set custom screenshot keys (like the shortcut keys you used on MacOS), and much more.

MacOS’s Spotlight allows you to easily search all your drives for certain files, and in Windows you do have a similar search functionality in Windows File Explorer but you can only search one drive at a time versus all drives at once and it’s extremely slow. Like snails pace slow. There’s two apps that are great replacements for Spotlight, and the first is Listary. Listary functions very much like Spotlight where if you press the Control key twice, it brings up a search bar where you can search for any file name on any drive and it’ll find it blazingly fast. You can then drag and drop the file into any app just like Spotlight. Another app that allows for quick and reliable search functionality on the PC, is Everything. Everything is a supercharged version of the Windows File Explorer that allows you to quickly find the file you’re looking for without decaying into a skeleton first.
Finally, let’s talk mail clients. I’m sure I’m in the minority, but I use email apps like the Mac Mail app vs. GMail. If you’re looking to replace the Mac Mail app like I was, I’ve started using PostBox which does it’s best impression of the Mac Mail app and is nicely designed.
Must Have PC Apps
Starting from scratch in PC land can be tough, and while I have my gripes that most software on MacOS runs way better than the Windows counterparts, there are some important apps to be aware of.
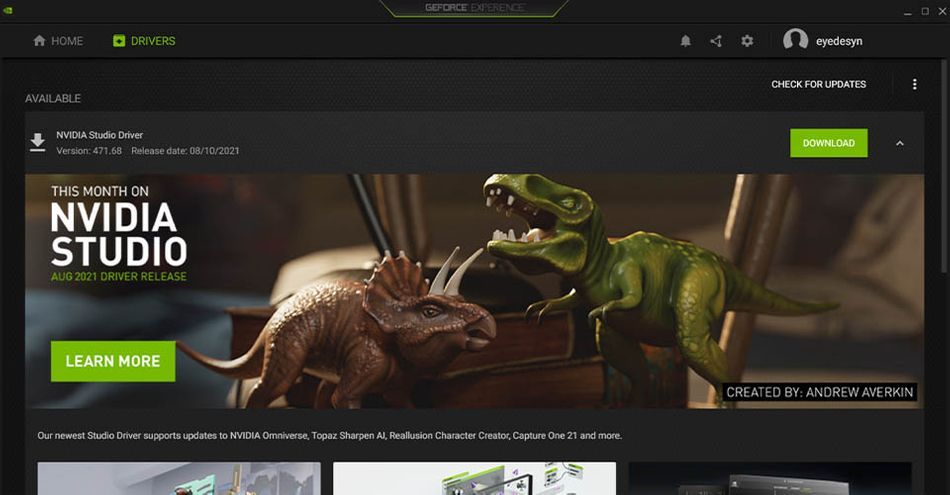
If you have Nvidia graphics cards, you’ll want to download the free GeForce Experience app. This app will handle all of your Nvidia driver installation tasks and make sure you’re up to date on all the latest and greatest drivers. Speaking of drivers (which is something you really never have to worry about in MacOS land), DriverEasy is an app that will check your computer hardware to make sure all your hardware drivers are up to date.
If you record tutorials or live stream to social media sites, OBS (Open Broadcaster Software) is a must have! It’s a free, open source app that allows for any company to make its own version of and by far I’ve discovered the Streamlabs OBS version of the OBS app is incredibly easy to use. Think of it as a well-designed skin with added functionality, much like the Files app that is an alternative to the File Explorer mentioned above.

One of the...well...dumb things about Windows is the lack of apps that do basic things like decompress .RAR files or manage your fonts. MacOS does both of these things right out of the box, but for decompressing on PC I downloaded the free 9Zip app from Microsoft Store. For font management, I grabbed the free Fontbase app that functions much like MacOS Font Book and is beautifully designed.
Another thing Windows lacks is a nice built in media player like MacOS Quicktime. The go-to media player app for Windows seems to be VLC. It’s free and people love it because it can play almost every video and audio format without any conversion. Another couple media players that folks swear by are PotPlayer and Look-See (free on the Microsoft Store), but with many of these softwares it comes down to personal preference. You can even download Quicktime for PC but its version 7 and is no longer supported by Apple. Still better than RealPlayer.

SHOW ME THE SHORTCUTS
One of the hardest parts about switching to PC was the muscle memory I had to build up all over again due to the different shortcut keys each OS uses. (I’m talking about you, Command/Control keys). While I finally think I’m getting the hang of it, here’s the shortcut keys that you should get familiar with to work more efficiently in PC land.
SHORTCUTS FOR PC
Cut [Ctrl]+[X]
Copy [Ctrl]+[C]
Paste [Ctrl]+[V]
Toggle between app windows [Alt]+[Tab]
Create Screenshot [Windows]+[Shift]+[S]
Search [Windows]+[Q]
Open New File Explorer Window [Ctrl]+[N]
Force Quit Apps via Task Manager [Ctrl]+[Alt]+[Delete]
Close Window [Alt]+[F4]
Maximize Window to Fullscreen [Windows]+[Up Arrow]
Add Virtual Desktop [Windows]+[Ctrl]+[D]

Not that I recommend it, but if you’re not willing to rewire your Mac brain and want your keyboard to work as it does on Mac, apps like SharpKeys allow you to remap your keyboard so you can swap your Ctrl and Alt keys so you can use your keyboard shortcuts as you would on MacOS.
Also, not so much a shortcut key than a kinda cool Windows feature, you can jam a window to the left or right to split screen with another app or jam it to the top of the screen to maximize the window. You can also shake a window to solo that window. That’s my token Windows compliment for this article. :P
The Key...to Making the Switch to PC
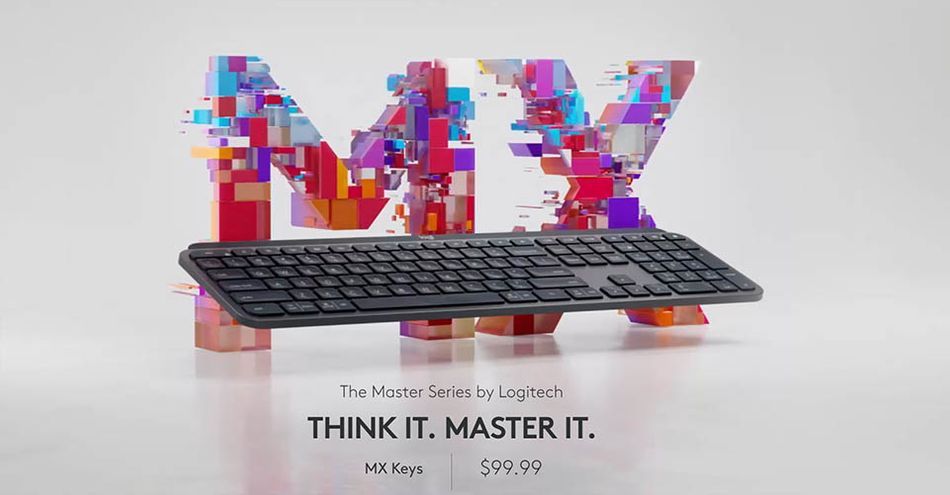
While we’re on the subject of keyboard shortcut keys, let’s talk about keyboards. While you can use Mac keyboards on a PC, I don’t recommend it. Some keys on your Mac keyboard just won’t work, and let's face it—it doesn’t help you at all with building up that muscle memory with the PC shortcut keys. If you’re really a diehard though, there are solutions that will allow you to use Apple mice and keyboards on the PC, like Magic Utilities.
Personally, I really did love the slim keyboards that Apple makes (except those awful butterfly keys on MacBooks). The keyboard I found that gave me a similar experience to the Mac keyboards was the Logitech MX Keys. It’s wireless via bluetooth, has backlit keys (oo fancy), and has a numeric pad which a lot of PC based keyboards don’t have for some reason. I’ve been using it for awhile now and I love it. It even has both Mac and PC commands on the keys.
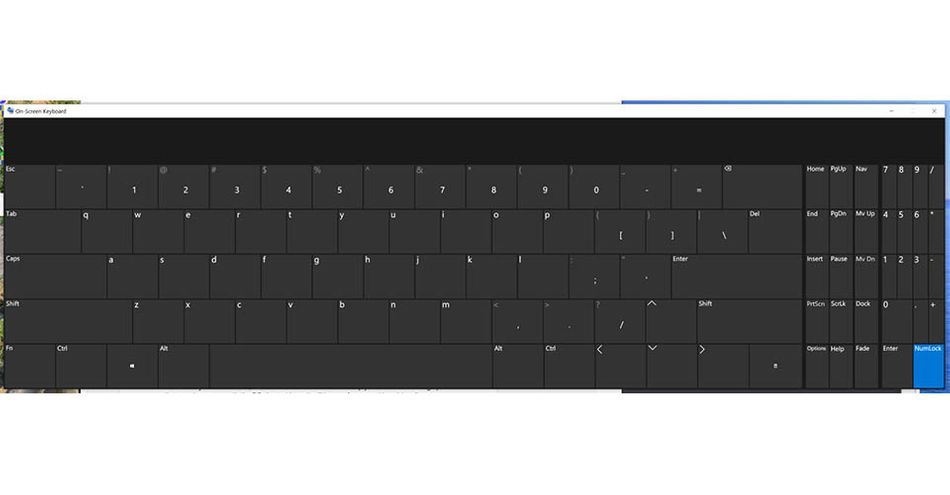
On the subject of numpads: When you use a keyboard that has the numpad on it, Windows won’t recognize any of those keys. To activate them, you need to do a little song and dance that goes a little something like this: press the Windows Key + Ctrl + O. A keyboard will appear on the screen. Click NumLock in the lower left to highlight it blue and voila, you can now use the numpad.
Have Your Windows Cake and Eat It Too

I’m not going to lie, I went to Windows kicking and screaming and for a good 3 months I had one foot still in my old Mac Pro and one in my new PC. I had a pretty simple setup that allowed me to easily switch between my Mac and PC using a KVM switch. KVM stands for ‘keyboard video ( aka monitor) mouse’ and it’s a device that allows you control two or more computers using a single keyboard, monitor, and mouse (or Wacom). The KVM switch I got only supported USB devices as the ones that can support monitors can get pricey. But the monitors I own have more than one input so I had both my Mac and PC plugged into both monitors. This made switching from Mac to PC and vice versa as easy as pressing a button on the KVM to switch my keyboard and mouse and changing the input on each monitor.
KVM is a hardware solution but there are software options like Synergy that also allows you to share your mouse and keyboard between computers. Alternatively, if you never want to set foot on a PC at all, there are awesome remote desktop solutions like Parsec where you can remotely log in to your PC and control it via your Mac. This way you can use your PC as a beefy remote render machine while never having to leave your Mac.
No More Mac?

While the switch to PC has been mostly pain free, again thanks to the folks at Puget Systems building me a rock solid setup, I do really miss Mac. I miss you, MacOS. I feel incomplete without you. It’s a beauty and so thoughtfully designed. The Mac was always my warm cozy blanket that kept me warm and safe from viruses.
Sure, I’ve found a lot of Windows apps that improve the functionality, the one thing I’ve found I can’t replicate on a PC is being able to get all your iMessages from your iPhone on my desktop. I also miss the “set it and forget it” mindset too. There’s been a handful of times things just stopped working on my PC, and the only fix was restarting the computer...and the amount of crashes I’ve experienced are exponentially more than what I’ve experienced on a Mac. C4D and Adobe apps are rock solid on Mac, but ever so less stable on a PC.
At the end of the day, I can render over 10 times faster than I could on my Mac and that’s worth putting up with all the inconveniences and frustrations I experience on a PC. That’s not to say that if Apple comes out with a worthy Mac Pro, with those incredible M1 chips that won’t cost me a kidney, that I won’t come running back to the Mac with open arms. Because I absolutely will! It’s been a long time and Windows still doesn’t seem to have even the slightest clue on how to keep up with Apple on the OS ease of use side of things.
So to me, it’s down to who does what first: Does Apple come out with a Mac Pro that is truly geared for 3D professionals, or will Windows finally come out with an OS that is truly geared for creatives? My bet is on Apple. I mean, who needs a kidney anyways?


